

Instagram Tile PSD Template
Do you ever wonder how those cool tiled images some artists post on their Instagram are created?
Well, basically what you are looking at is, in fact, a series of separate images, each one a square cut out of a larger image, that fits into a set of 3, 6, 9, 12 or 15 images (you can do more, but most phones in portrait mode will show up to 15 tiles – a 3×5 grid).
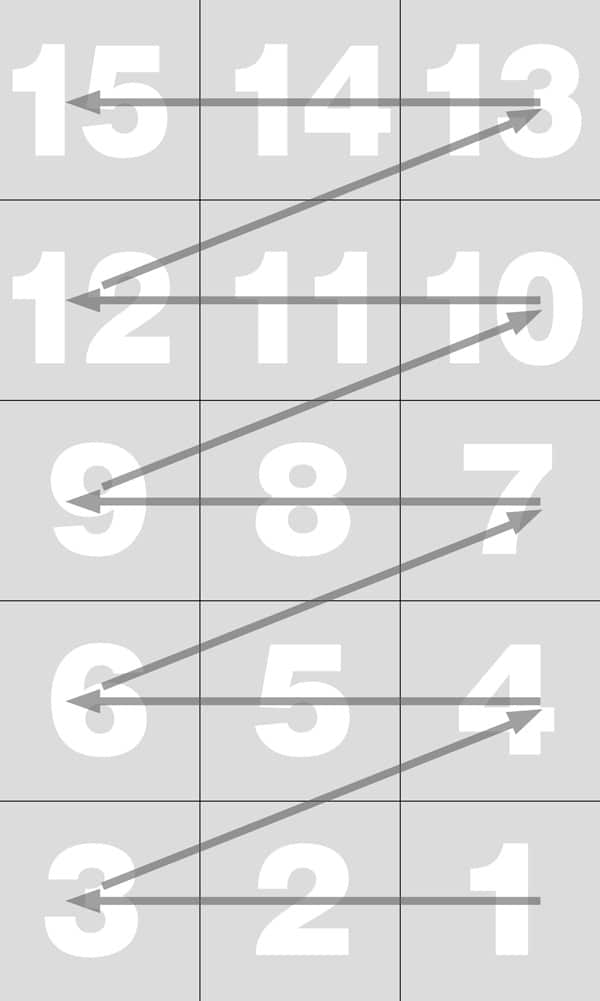
When posting, the secret is to post from the bottom right corner up to the top left corner, going backward on each row from the bottom to the top.
Also, you HAVE to post in multiples of 3. If you don’t everything will break apart, like when you move around the tiles of one of those tile puzzles (not exactly like it, but you get my point).
And you will also need, for as long as you want your tiled image to remain looking the way you want it, to practice some discipline regarding your Instagram posts. Meaning, that you will have to make certain, that when you add new posts, you post in sets of threes as well. So as to avoid your tiled image breaking up in the future. Remember, it’s not like a table or fixed grid, it’s a set of separate images, which behave independently. It’s up to you if they continue to display in the right order.
I have created a PSD (Photoshop) file, that works as a template for cutting up an image, including the separation they have when displayed in the Instagram wall.
Now, it’s important to mention that this separation will be different depending on the device you use to view the Instagram grid, so there’s really nothing much I can do about it. For instance, if you look at the tiles on a desktop browser, the separation is a LOT wider and taller. So the image will be stretched visually because of it. But Instagram is intended for mobile use anyways, so you’ll be fine.
To download the template from my personal Dropbox, use this link: DOWNLOAD THE TEMPLATE
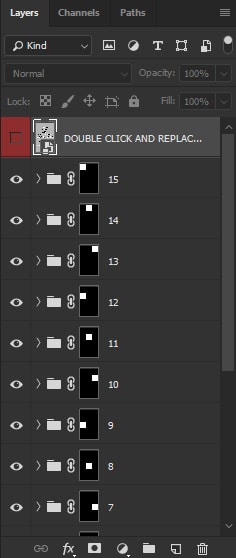
If you don’t know your way around Photoshop, just make sure the Layers palette is open, and you will see something like this:
Now, the first you need to do, is REPLACE the content of the image for the one you want. The right size is included in the current image:
3250×5420 px.
BUT, you can actually work with an image of less height, in case your image is more squarish, or you want to use less tiles. Just, as the red layer says, double click on that red layer’s thumbnail and a second image will open (psb format, which is a “Smart Object” image, that will repeat itself as instances in all of the other layers, adjusting to each layer mask tile). Make sure you save your changes in the PSB image, and then get back to the PSD image and watch it update.
Once you have done that, the rest is even easier!
Now click on one of the top masked layer (the ones with a small black thumbnail with a white square and a folder icon next to it), scroll down the layers palette to the one at the bottom of that stack, the number “1” layer, and while holding the SHIFT key click on that one too (don’t select the one way at the bottom named “TILES – just for reference”, those are in case you want to adjust the masks to a different size, but you need better knowledge of Photoshop to use it).
All of those layers should be highlighted now, meaning, they are all selected.
And now right-click (yeah, sorry, if you are a Mac user, you need to mentally adjust some of my instructions) on the NAME/NUMBER of any of those layers. A context menu will appear. Click on “Export as…”.
A popup dialog box with a preview will appear:
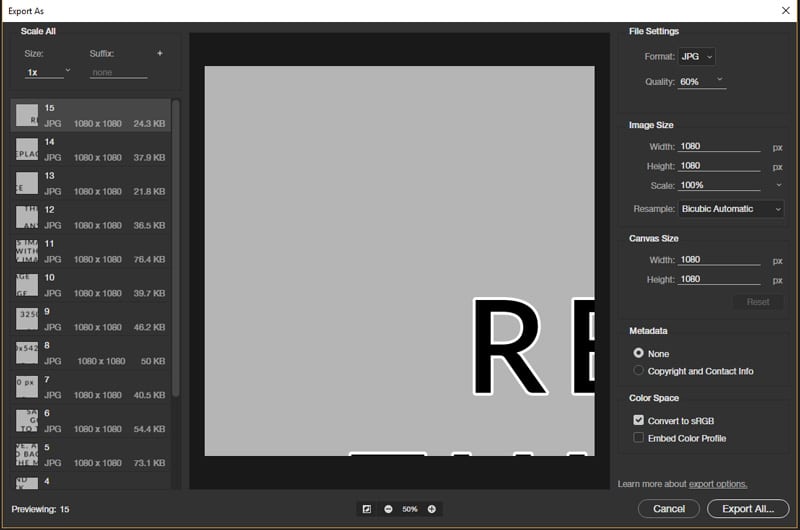
Make sure you are exporting as a JPG (top right dropdown), and you can set the quality to 65%. There is a reason for this that I will soon mention.
On the left side of the dialog box, are the names of all the images you will export: 15.jpg, 14.jpg, etc.
Again, click on the top one, and scroll down and while holding the SHIFT key, click on the one at the bottom named 1.jpg
This is just to tell Photoshop to export ALL of the layers you selected.
Choose the folder in your computer where you want to export the results and voilá! You are done!
The reason why I suggested you export JPG’s in a lower quality (that will still look ok), is that if you are doing this on a laptop or desktop computer, then most probably, unless you have an Android emulator like Bluestacks, you will have to SEND yourself those images to then use your mobile phone to post them to your Instagram account. So a smaller size means you can use a single go with your email account to later download them from that email to your phone.
There, that’s it. Just remember the posting order I mentioned at the top of this tutorial.
I hope this was useful to you, and if it was, I would really appreciate some love back in the form of a thank you, an encouraging comment, or even constructive criticism.
ENJOY!
EL TUTORIAL EN ESPAÑOL: